Posted in JavaScript
by Chris on May 24, 2016
Lately I've been using the Require.js library a lot to modularize my front end JavaScript applications. Require.js expects 'AMD compatible' JavaScript files that have the main program wrapped inside a define([], function(vars) {}) function. This format allows the file to explicity call out any files it depends on so that a library like Require.js can load all the files in the right order. The advantages are three fold:
- Race conditions are avoided by loading scripts in an explicit order.
- JavaScript files can be called on an as-needed basis rather than front loading everything, thus improving performance.
- It allows complex JavaScript programs to be modularized into small files that are mission specific. This is a best practice that helps with maintenance and collaboration.
The problem with wrapping a JavaScript file in this kind of function is that it breaks it's ability to work with normal HTML files that call JavaScript files with a <script> tag. The reason is that the global define() function doesn't exist unless your using an AMD loader like Require.js. This becomes a serious issue when trying to use a common file to store settings, like server IP addresses, ports, admin email addresses, etc. Attempting to share this file between your AMD app and normal HTML files isn't possible.
Through a lot of trial an error, I was able to create the following serverData.js file for use in my latest program:
/*
 * This file is the central location for setting the server info. It is set up to work with both vanilla JS files as well as AMD/Require.js enabled JS files.
 */
function getServerData() {

  var serverData = {

    //Development Server
    serverIp: '192.241.198.211',
    serverPort: '80', //Not Used
    mailPort: '8888',
    adminEmail: 'chris.troutner@gmail.com',

    //Separate each email address with a comma
    additionalEmails: ''

    /*
    //Production Server
    serverIp: '198.199.101.123',
    serverPort: '80', //Not Used
    adminEmail: 'ctroutner@skagitpublishing.com',
    additionalEmails: 'test@test.com,admin@test.com,marketing@test.com'
    */
  }

  return serverData;

};

//This little bit of code handles AMD enabled JS files that expect a define() function.
if ( typeof define === "function" && define.amd ) {
  define([], getServerData );
}
That last little code paragraph takes care of the AMD program. If the HTML file doesn't use AMD, it simply skips it. The function on top is 100% compatible with a normal HTML/JavaScript scheme. When this file is attached to an HTML file with a <script> tag, the getserverData() function becomes a global object. It can simply be called and the return value dumped into a local variable in order to get the server information.
Voila! All the important server information, emails, etc in one single location. This makes updates and maintenance easy.
Read more...
Posted in KeystoneJS, JavaScript
by Chris on December 06, 2015
In Part 1 I provided the routing files necessary to open up the KeystoneJS API for accepting images. I also showed how to create a simple HTML form for uploading images and pointed out some of the limitations of the API. In Part 2 I'll show how to simulate a form with JavaScript so that images can be uploaded via JavaScript code rather than an HTML form. I'll also show how to use the JavaScript Caman.js library to edit images on a HTML5 canvas element, then upload them to the server.
Uploading Images Via JavaScript
Here is a very simple HTML form. Notice that the Submit button is of type 'button' and not 'submit'. It also has the onclick property set to the JavaScript function uploadImage().
<form>
  <input type="file" id="image_upload" onchange="displayUploadImage()">
  <br>
  <img id="imageToUpload" src="" />
  <br>
  <input type="button" value="Submit" onclick="uploadImage()">
</form>
Check out this code while I walk you through it:
function uploadImage() {
  var selectedFile = $('#image_upload').get(0).files[0];
  var fileName = selectedFile.name;

  //Create the FormData data object and append the file to it.
  var newImage = new FormData();
  newImage.append('image_upload', selectedFile); //This is the raw file that was selected

  var opts = {
    url: 'http://'+serverIp+':3000/api/imageupload/create',
    data: newImage,
    cache: false,
    contentType: false,
    processData: false,
    type: 'POST',
    success: function(data){
      console.log('Image upload ID: ' + data.image_upload._id);
    }
  };

  //Execute the AJAX operation.
  jQuery.ajax(opts);
}
The simple HTML form provides the user interface for retrieving a file. The first line of the JavaScript function assigns the selected file to to the selectedFile object. The object newImage is of type FormData, which is the JavaScript equivalent of a form. The selectedFile object is appended to it with the value 'image_upload'. This is all creating the JavaScript equivalent to the HTML form in Part 1.
Just as in our HTML form, we can't 'append' any values other than 'image_upload'. They will be ignored. Only the image can be uploaded. We can however update other values in the database with a second AJAX request once the image has been successfully uploaded.
The opts object further fleshes out the settings that our FormData object needs in order to upload the selected image correctly. KeystoneJS is very picky about its settings and it took me several hours to find the right combination above.
In the opts values, you'll see a function assigned to the 'success' key. When the image is uploaded, KeystoneJS will respond with the _id GUID it generates when creating the new database entry. It will return this value in response to the AJAX post request, so I display this value in the browser console. This value will be needed in order to update the image data with a second AJAX request.
The last line in the code above executes the AJAX request for uploading the image.
Displaying a Thumb Nail Image
In order to begin visually editing the image, the first step is to display the selected file in the browser. The code below for doing that is borrowed from this MDN tutorial. It's really weird and I'm not totally comfortable with the way they are doing it, but the code works in Chrome and Firefox and it's very compact, which is nice.
function displayUploadImage() {

  var imageFile = $('#image_upload').get(0).files[0];
  var imageToUpload = $('#imageToUpload')[0];


  //Display the selected image file in the browser
  var reader = new FileReader();      //Create a new FileReader object

  reader.onload = (function(aImg) {   //These functions are executed when the FileReader
    return function(e) {            //finishes reading the image file.
      aImg.src = e.target.result; //It displays the image file.
    };
  })(imageToUpload);

  reader.readAsDataURL(imageFile);    //Read the selected file with the FileReader.


  //Replace the image with a canvas element and control it with Caman.
  Caman("#imageToUpload", function () {

    //This is where I would do image manipulation like resizing and cropping.
    //For now this is just a place holder.
    this.brightness(5).render();
  });
}
After the image has been populated with the selected image file, the Caman function gets called to replace the image with an HTML5 canvas. Check out the CamanJS website, especially the example page that displays some of the in-browser editing you can do to an image. In the code above, all I do is adjust the brightness by 5%. The point is that this is the step where you'd edit your image: crop, scale, give the user a UI. Whatever you want.
Converting HTML5 Canvas to a File
So we've got two awesome ingredients: A way to upload image files to KeystoneJS and a way to edit images in the browser. How do we combine them? The answer to that my friends took me several hours to figure out. HTML Canvas elements are brand new and all the specifications around them have not been fully implemented into Chrome. The most common solution I found entailed converting the canvas image to ascii, uploading the ascii string to a server running a php script, and calling base64_decode() in the script. It was literally the only solution I could find after hours and hours of research, but I managed to come up with my own JavaScript based solution that avoids the use of PHP or extra server calls.
One of the HTML5 canvas specifications that haven't been implemented in Chrome yet is the .toBlob() function. This would be the easiest way convert the canvas to a file for upload via our JavaScript FormData object. The .toDataURL() function is widely implemented, which converts the canvas to an ascii string and results in all the nonsense with PHP and the base64_decode() function. However, the .toBlob() functionality is available as an external JavaScript library via this GitHub repository. Simply download the repository and include the canvas-to-blob.js file in your html. Thank you Sebastian Tschan!
Back to the uploadImage() function, Batman!
function uploadImage() {
  var selectedFile = $('#image_upload').get(0).files[0];
  var fileName = selectedFile.name;

  //Below I'll createa file based on the manipulatd Canvas.
  var canvas = $('#imageToUpload')[0];
  if (canvas.toBlob) { //Ensure the toBlob library is loaded
    canvas.toBlob( handleCanvasBlob, selectedFile.type );
  } else {
    console.error('Could not access toBlob library!');
    return;
  }
}


function handleCanvasBlob(blob) {

  var the_file = new File([blob], fileName, {type: blob.type});

  //Create the FormData data object and append the file to it.
  var newImage = new FormData();
  newImage.append('image_upload', the_file); //This is the raw file that was selected

  var opts = {
    url: 'http://'+serverIp+':3000/api/imageupload/create',
    data: newImage,
    cache: false,
    contentType: false,
    processData: false,
    type: 'POST',
    success: function(data){
      console.log('Image upload ID: ' + data.image_upload._id);
      }
    };

  jQuery.ajax(opts);
}
In the uploadImage() function, I add a call to the .toBlob() function. The handleCanvasBlob() function handles the callback when the browser finishes converting the canvas to a blob. The line new File([blob], fileName, {type: blob.type}); converts the Blob object into a File object. The code below that is just a copy of what was originally inside the uploadImage() function, which handles the file upload to KeystoneJS.
One thing to watch out for is that the filename does not survive this manipulation process. Notice that I call the object fileName in the File() constructor. This is a global variable that I used to store the file name.
Combining the information in Part 1 and Part 2, you can now allow users to upload an image, perform on-the-fly image editing, and then submit that image to KeystoneJS. Have fun!
Read more...
Posted in KeystoneJS, JavaScript
by Chris on November 24, 2015
KeystoneJS does not come with comments for the blog. I wanted to add some so that I can get feedback on my tutorials. I eventually decided to roll with the Disqus comments you see below. It wasn't my first pick, but ultimately, it was the fastest and easiest way to roll.
I started by reaching out to the KeystoneJS Google Group with this thread. A reply to that thread led me to this commit in the sydjs-site repository. I started trying to impliment comments this way, but I am not a fan of server-side rendering. I realize this is a bit of a contradiction since I'm such a KeystoneJS fan and it's *big* on server side rendering. Honestly, I probably would have passed on using KeystoneJS if I hadn't found out how to open the API so that I could pull data from the CMS and do client-side rendering with it.
So true to my nature, I started steps very similar to creating a Front End Widget in order to deal with comments. Here is a pastebin of the model I created in model/PostComment.js. I created an API for accessing the model the same way I did for the Front End Widget. I began doing the front end coding for adding and removing comments to blog posts when a though occured to me: "Can I really do this better than some 'free' option?"
I paused right there and started to look for embeddedable comment options. The two big contenders were Disqus and Discourse. Discourse has the disadvantage of requiring people to navigate away from a page and go to a Discourse forum page to leave a comment. I really didn't want that. I used Disqus when they first came out and it left a bad taste in my mouth. They were really spammy, but so far, I'm pretty happy with the lack of spam. Plus, they let people log in with social network credentials like Google and Facebook, and they integrate comment voting. Both very cool features that I like in the modern web.
So for better or worse, I went with Disqus. It was an easy decision and easy to impliment. I just added their code to the bottom of my templates/views/post.hbs file. Just above their embed code snippet, I added this code:
{{#if data}}
  <script type="text/javascript">
    var postUrl = 'http://christroutner.com/blog/post/{{data.post.slug}}';
    var postSlug = '{{data.post.slug}}';
  </script>
{{/if}}
I was then able to feed the postUrl and postSlug variables into the default Disqus embed code like this:
...
var disqus_config = function () {
this.page.url = postUrl; // Replace PAGE_URL with your page's canonical URL variable
this.page.identifier = postSlug; // Replace PAGE_IDENTIFIER with your page's unique identifier variable
};
...
Read more...
Posted in KeystoneJS, JavaScript
by Chris on November 13, 2015
Table of Contents:
The front end side of things is pretty straightforward. The code in part 3 can be copy and pasted into any of the *.hbs Handlebar template files in the templates/views/ directory. These are the front end templates that KeystoneJS serves up. For instance, templates/views/index.hbs is the template for the home page.
You could do the same thing with the Artificial Back End, but then anyone with the URL will be able to maliciously update your widgets. I haven't figured out a way to password protect the API yet, so hopefully someone in the KeystoneJS group will chime in with a good way to do that. However, you can at least protect the Artificial Back End.
As an aside, here is what I've tried to password protect the API, but it didn't work. I have tried to change this line in routes/index.js:
app.all('/api/frontendwidget/:id/update', keystone.middleware.api, routes.api.frontendwidget.update);
to this:
app.all('/api/frontendwidget/:id/update', middleware.requireUser, routes.api.frontendwidget.update);
which seems to be the obvious way to password protect the API, but it errors out. We can however, do the same thing to password protect the page. In order to do that, add this line to routes/index.js:
// Setup Route Bindings
exports = module.exports = function(app) {
...
        app.get('/updatefrontend', middleware.requireUser, routes.views.updatefrontend);
};
That will create a password protected route to our new page. Now, create the file routes/views/updatefrontend.js and paste this code into it:
var keystone = require('keystone');

exports = module.exports = function(req, res) {

        var view = new keystone.View(req, res);
        var locals = res.locals;

        // Set locals
        locals.section = 'updatefrontend';

        // Load the galleries by sortOrder
        view.query('frontendcollections', keystone.list('FrontendWidget').model.find().sort('sortOrder'));

        // Render the view
        view.render('updatefrontend');

};
Finally, paste the html from Part 4 into the file templates/views/updatefrontend.hbs to complete the process. This hbs file is the html that KeystoneJS will serve. The page can be accessed from http://<your ip>:3000/updatefrontend and the page will require that you be loggined in as an Admin user.
Read more...
Posted in KeystoneJS, JavaScript
by Chris on November 10, 2015
Table of Contents:
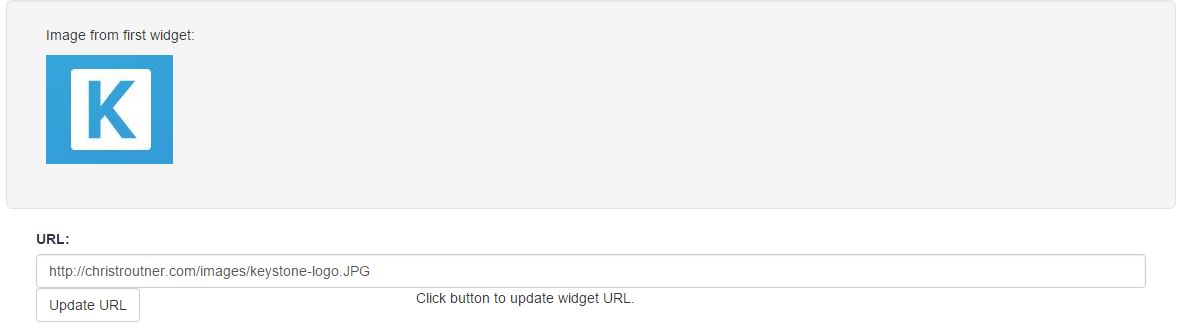
Updating widget data through the KeystoneJS API is very similar to retrieving it. Copy and paste the below code into an HTML file, update the server IP, and open it in a browser. It will generate a simple form that will allow you to update the URL of the first image in the first widget.
<!DOCTYPE html>

<!--
Note: You'll need the bootstrap css and js files and change the paths to them below.
-->

<html lang="en">
<head>
  <title>KeystoneJS API Example</title>

  <link href="css/bootstrap.min.css" media="all" rel="stylesheet" />
</head>
<body>


  <section>
    <div class='container'>
      <div class="row well well-lg">
        <div class="col-md-12">
          <p>Image from first widget:</p>
          <img id="image1" src="" alt="" />
          <br><br>
        </div>
      </div>

      <form action='' method="post" name='updateImgForm' id='updateImgForm' enctype='multipart/form-data'>
        <div class='form-group' >
          <div class='col-md-12'>
            <label for='widgetUrl'>URL:</label>
            <input class='form-control' type='text' id='widgetUrl' size="36">
          </div>
        </div>
        <div class='form-group' >
          <div class='col-md-4'>
              <button class="btn btn-default" type='button' id='oldUrlBtn' onclick='updateWidget()'>Update URL</button>
          </div>
          <div class='col-md-4'>
              <span id="checkMsg1">Click button to update widget URL.</span>
          </div>
          <div class='col-md-4'>

          </div>
        </div>
      </form>

    </div>
  </section>

  <script src="https://ajax.googleapis.com/ajax/libs/jquery/1.11.1/jquery.min.js"></script>
  <script src="js/bootstrap.min.js?body=1"></script>

  <script type="text/javascript">
    //Global Variables
    var serverIP = '<your ip here>';
    var JSONData;

    //First function that is called when the document finishes loading.
    $(document).ready( function() {

      //Call server to retrieve JSON Gallery data.
      $.getJSON('http://'+serverIP+':3000/api/frontendwidget/list', '', processJSON);
    });

    //Callback function executed when JSON data is returned.
    //Sorts the items in data.collections into different categories.
    function processJSON(data) {
      debugger;
      //Fill in the images with data from the KeystoneJS API
      $('#image1').attr('src', data.collections[0].url1);
      $('#image1').attr('alt', data.collections[0].alt1);
      $('#widgetUrl').val(data.collections[0].url1);

      JSONData = data; //Copy to global varible.
    }

    //This function is called when the 'Update URL' button is clicked.
    function updateWidget() {
      var collectionId = JSONData.collections[0]._id; //GUID of the first widget

      //Update the JSON data with the data from our form.
      JSONData.collections[0].url1 = $('#widgetUrl').val();

      //Send the JSON string to the server and log a copy on the console.
      console.log('JSON data sent: '+JSON.stringify(JSONData.collections[0])); //Used for debugging.
      $.getJSON('http://'+serverIP+':3000/api/frontendwidget/'+collectionId+'/update', JSONData.collections[0], validateChange);
    }

    //This function handles the AJAX callback from the server after a POST request has been sent to update the widget.
    //The purpose of this function is to validate that the data returned from the server matches the changes made.
    function validateChange(data) {

      //If the returned data matches the data in our form, then report a success.
      if( data.collection.url1 == $('#widgetUrl').val() ) {
        $('#checkMsg1').text('Widget successfully updated!');
      } else {
        $('#checkMsg1').text('Update failed!');
      }
    }

  </script>

</body>
</html>
Here's what the HTML page looks like:
To really study the code, I suggest you insert debugger statements at the top of each function and then run through the code line by line in Chrome Dev Tools. That way you can see the ways the API URL and other variables are getting manipulated.
The API is very picky about the format of the JSON, so it's best to simply manipulate the JSON returned by the server and then feed it back. If it doesn't like something, it won't complain, it simply won't update the widget. You can test if your changes were rejected by testing the returned JSON data against the manipulated JSON data.
Read more...
Posted in JavaScript, KeystoneJS
by Chris on November 08, 2015
Table of Contents:
The first step in displaying data on the front end is to open up Cross Origin Resouce-Sharing (CORS). Add the following lines to the file node_modules/keystone/lib/middleware/api.js.
exports = module.exports = function(keystone) {
        return function initAPI(req, res, next) {

                //Add CORS
                res.header("Access-Control-Allow-Origin", "*");
                res.header("Access-Control-Allow-Headers", "Origin, X-Requested-With, Content-Type, Accept");


                res.apiResponse = function(data) {
...
There is a cors.js file in that directory that you could point the route to, but I had trouble in trying to execute it. In reality you only need to add the above two lines. Please note that there are security issues surrounding the concept of CORS. You should Google it and have a thorough understanding of the risks involved.
Once again, you'll need to reboot KeystoneJS to make the changes go into affect.
Manipulating Front End Objects Through The API
Paste the following HTML into a file and open it in your browser. Note that you'll need to download the bootstrap css and js files to make it work correctly. This gives you an example using jQuery and the API to dynamically manipulate front end objects with data retrieved from the API.
<!DOCTYPE html>

<!--
Note: You'll need the bootstrap css and js files and change the paths to them below.
-->

<html lang="en">
<head>
  <title>KeystoneJS API Example</title>

  <link href="css/bootstrap.min.css" media="all" rel="stylesheet" />
</head>
<body>


  <section>
    <div class='container'>
      <div class="row well well-lg">
        <div class="col-md-12">
          <img id="image1" src="" alt="" width="600px" />
          <br><br>
          <img id="image2" src="" alt="" width="600px" />
          <br><br>
          <img id="image3" src="" alt="" width="600px" />
        </div>
      </div>
    </div>
  </section>

  <script src="https://ajax.googleapis.com/ajax/libs/jquery/1.11.1/jquery.min.js"></script>
  <script src="js/bootstrap.min.js?body=1"></script>

  <script type="text/javascript">
    //Global Variables
    var serverIP = '<your ip address>';

    //First function that is called when the document finishes loading.
    $(document).ready( function() {

      //Call server to retrieve JSON Gallery data.
      $.getJSON('http://'+serverIP+':3000/api/frontendwidget/list', '', processJSON);
    });

    //Callback function executed when JSON data is returned.
    //Sorts the items in data.collections into different categories.
    function processJSON(data) {
      //Fill in the images with data from the KeystoneJS API
      $('#image1').attr('src', data.collections[0].url1);
      $('#image1').attr('alt', data.collections[0].alt1);
      $('#image2').attr('src', data.collections[1].url1);
      $('#image2').attr('alt', data.collections[1].alt1);
      $('#image3').attr('src', data.collections[2].url1);
      $('#image3').attr('alt', data.collections[2].alt1);
    }

  </script>

</body>
</html>
Read more...
Posted in JavaScript, KeystoneJS
by Chris on November 05, 2015
After familiarizing myself with KeystoneJS I decided to use it as the CMS (content management system) of choice for my clients. This requires customizing a lot of features. After a couple false starts, I realized that the vast majority of the customization I needed to do could be accomplished by a generic front end 'widget'.
What I mean by a front end widget is a generic database model that will allow me store values for a couple images and paragraphs. I can then retrieve this wiget and display it on the front end. I realize this sounds archaic. Just bear with me, because if you are like me and need to customize KeystoneJS to create a CMS for your clients, you're going to want to see this. It's going to be a game changer for you, like it has been for me.
Here is how the tutorial breaks down:
Even if you don't like my idea of the wiget. This tutorial should provide a lot of value to developers aspiring to customize KeystoneJS for their own needs.
Note: I used Handlebars instead of the default of Jade as my template of choice. When using the yo keystone command during setup of KeystoneJS, it asks you which one you want to use. If you follow the tutorials on this blog, then make sure you choose Handlebars (hbs), otherwise they won't work.
Creating the Database Model
The nice thing about KeystoneJS is the simple format for creating new MongoDB database models. Create a file called FrontendWidget.js in the models/ directory and paste this code into it:
var keystone = require('keystone');
var Types = keystone.Field.Types;

/**
 * Frontend Widget Model
 * ===========
 * Frontend Widgets are simply links to image URLs that will be posted to the front-end.
 * This model intended can be updated with a custom UI or the KeystoneJS backend.
 */

var FrontendWidget = new keystone.List('FrontendWidget', {
        map: { name: 'title' }
});

FrontendWidget.add({
        title: { type: String, required: true },
        url1: { type: String },
        alt1: { type: String },
        attributes1: { type: String },
        category: { type: String },      //Used to categorize widgets.
        priorityId: { type: String },    //Used to prioritize display order.
        url2: { type: String },
        alt2: { type: String },
        attributes2: { type: String },
        content1: { type: String },
        content2: { type: String },
        content3: { type: String },
        content4: { type: String },
        trans1: { type: String }, //default transformaiton
        trans2: { type: String }

});


FrontendWidget.defaultColumns = 'title';
FrontendWidget.register();
You don't have to follow the exact field entries above. Some of them, like trans1 and trans2 may not be of any use to you. Once you run through this tutorial and understand what is being done and how it's being used, feel free to make changes to your model to make it suit your needs.
After creating that file, restart KeystoneJS, log into the back end of the Admin UI and you will see an entry for your front end widget. Isn't that awesome!? KeystoneJS automtically creates the back end pages you need to add and edit widgets. Cool!
Still, if you're like me, you probably don't want to confuse your client by letting them loose in the Admin UI. Too many options, buttons, and things to mess up. Later on in this tutorial, I'll show you how to create a front end, which I like to call the Artificial Back End, to allow them to edit the widget through the API. This allows you to remove surperfluous entries and customize the widget on-the-fly so that clients don't run amok or get confused.
Read more...
Posted in KeystoneJS, JavaScript
by Chris on November 03, 2015
I'm not sure what other developers use for debugging the back end of Node apps like KeystoneJS. I love the Dev Tools in Chrome for debugging front end JavaScript. Compared to that, using the Node inspector for debugging node applications is painful and slow. Be sure to drop me a line if you have a suggestion for a better back end debugging solution.
So, I discovered a little hack that lets me retrieve back end JSON data and display it on the front end. Here's how:
Add this Handlebars helper to the end of the file templates/views/helpers, right above the line that says return _helpers;
// JSON.stringify helper.
// This is used to send JSON data to the front-end so that it can be handled
// by front-end JavaScript.
// 10/21/15 Chris Troutner
_helpers.JSON = function(obj, options) {
 debugger;
 return JSON.stringify(obj);
}
That will allow back end JSON data to be stringified for input into the Handlebars template. Now, whatever template page you want to display data on, you can with the little code snippet below. For instance, I added this code to the bottom of templates/views/blog.hbs:
{{#if data}}
  <script type="text/javascript">
    var blogdata = {{{JSON data}}}
  </script>
  <p>blog data loaded.</p>
{{else}}
  <h3 class="text-muted">Blog data not loaded.</h3>
{{/if}}
And now your back end JSON data is stored inside a front end javascript varible. You can use Chrome Dev Tools to play with the data on a JavaScript command line or simply view the souce code of the page to look at the raw data.
Read more...
Posted in KeystoneJS, JavaScript
by Chris on October 27, 2015
One of my first roles at Skagit Publishing as a website designer was to find them a new Content Management System (CMS). As I have an affinitiy for JavaScript over PHP, I began focusing on JavaScript based CMS. With Node and the Express.js library only being a few years old, there aren't many well established CMSs out there. KeystoneJS seemed to be the most developed and best supported JavaScript-based CMS I could find.
I've begun learning the ins and outs of KeystoneJS as well as building and customizing the CMS for one of Skagit Publishing's clients. I decided I should drink my own koolaid, so I've ported ChrisTroutner.com over to KeystoneJS too. I had some trouble getting the Angular.js library to run correctly. In all honesty, I haven't been terribly impressed with Angular in my own personal experience using it. At first, I used it extensively on ChrisTroutner.com, but there was nothing I used it for that I couldn't have accomplished with jQuery. I've decided to refactor the Angular code into jQuery and drop the use of the Angular library for now. Based on what I've been reading in the KeystoneJS Google group, Angular.js is losing mindshare to the React.js library anyways. KeystoneJS is redoing their entire back-end in React.js, and so I'm motivated to focus on my energies on learning React.js as well.
- I captured the steps needed to get KeystoneJS up and running on a VPS in this blog post.
- This tutorial showed me how to get this website up and running on Port 80
- I'm working through this tutorial to allow me to point my domain name at a Droplet/VPS.
Note: I used Handlebars instead of the default of Jade as my template of choice. When using the yo keystone command during setup of KeystoneJS, it asks you which one you want to use. If you follow the tutorials on this blog, then make sure you choose Handlebars (hbs), otherwise they won't work.
Read more...